Address
304 North Cardinal St.
Dorchester Center, MA 02124
Work Hours
Monday to Friday: 7AM - 7PM
Weekend: 10AM - 5PM
Address
304 North Cardinal St.
Dorchester Center, MA 02124
Work Hours
Monday to Friday: 7AM - 7PM
Weekend: 10AM - 5PM
PVC film is one of the most practical and scalable materials for ID card lamination—helping protect printed data, improve handling feel, and extend card life in everyday use. Whether you produce employee badges, student IDs, membership cards, access control cards, or visitor passes, choosing the right thickness and ensuring printing compatibility will directly impact yield rate, clarity, and durability.

This guide explains how to select PVC film thickness options, match lamination film to common printing methods, and achieve a durable finish with consistent results. It also includes production-focused tips for stable quality and cost control—especially important for high-volume issuers.
In ID card manufacturing, lamination film is typically used as a protective overlay that bonds to a printed core (or printed sheet) under heat and pressure. The laminated layer helps:
Key benefits:
✓ Reduce scratches, scuffs, and fingerprint marks
✓ Improve resistance to moisture, oils, and daily handling
✓ Protect printed photos, names, and barcodes/QR codes from fading
✓ Enhance stiffness for easier insertion into readers and holders
✓ Enable finish control (gloss, matte, soft-touch, anti-glare)
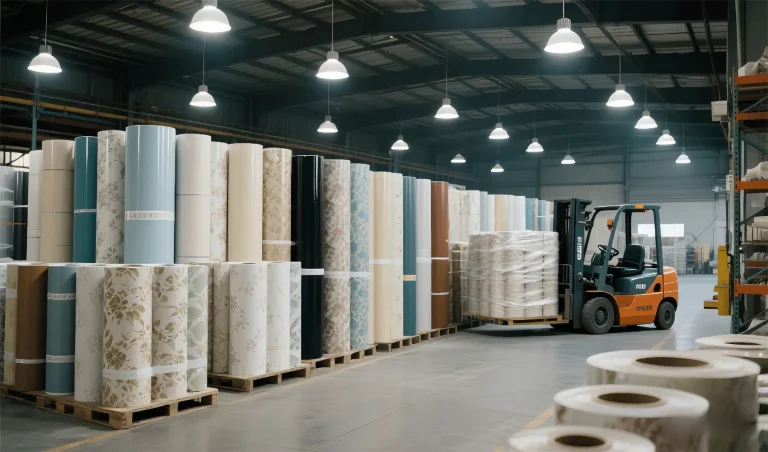
For stable lamination, the film must deliver consistent thickness tolerance, good optical clarity, and reliable bonding performance across the press temperature/pressure window. Many manufacturers prefer calendered PVC film for repeatability in large batches; see typical options under
Calendered Film.
Thickness selection is not only about “stronger is better.” It affects card stiffness, edge quality after cutting, lamination cycle time, and whether the card meets common thickness standards (often around 0.76 mm / 30 mil for CR80-style cards, depending on local requirements).
Typical reference ranges (final choice depends on your structure and standard):
• Thin overlay films (often ~40–100 μm): better flexibility, faster heat transfer, good for short-life badges and cost-sensitive programs.
• Mid-range overlays (often ~100–200 μm): balanced stiffness and protection; common choice for everyday employee/student IDs.
• Thicker laminating layers (often ~200–300+ μm): improved rigidity and edge durability; useful for harsh environments and frequent reader interaction.
Different ID programs have different “wear patterns.” Use cases can guide your thickness choice more reliably than guessing based on price.
Quick match table (practical guidance):
✓ Visitor badges / events: thin-to-mid overlays to control cost and speed up production.
✓ Employee access cards: mid overlays for daily handling, wallet carry, and reader usage.
✓ Campus / library cards: mid-to-thicker overlays to resist abrasion from bags and lanyards.
✓ Industrial sites / outdoor use: thicker overlays plus appropriate surface finish to reduce scuffing.
In production, consistent thickness is often more important than choosing an exact number on paper. Tight tolerance helps ensure:
stable lamination pressure distribution, fewer bubbles at edges, consistent cutting, and predictable final card thickness.
A strong laminate can still fail if the printing system and lamination structure are mismatched. The most common problems are ink migration, loss of barcode readability, and delamination caused by inadequate bonding to the printed layer.
For offset or screen printed sheets, the lamination film must bond reliably without distorting fine text. The recommended approach is to confirm:
ink curing level, sheet moisture, and lamination window (temperature/time/pressure).
Production tip:
✓ If you see “silvering” or micro-bubbles, review press pressure uniformity and confirm the film surface energy is suitable for your print layer.
Digital printing can introduce additional variables: toner thickness, ink solvent compatibility, and heat sensitivity. A practical workflow is:
print → fully dry/cure → test-laminate → test-cut → test abrasion.
If you print dense blacks or photo backgrounds, a higher clarity film and controlled lamination parameters help maintain image depth. For branding-heavy cards where surface feel matters, some producers explore decorative and tactile film technologies (for non-card applications as well) such as
3D Silk Texture Film
to learn how texture affects perceived quality—then apply similar thinking to card surface selection (gloss vs matte vs anti-glare).
Lamination should protect data without reducing scan performance. The two most common causes of scanning failure are:
excessive glare and optical haze.
Checklist for scan-friendly lamination:
✓ Use high-transparency film for barcode zones
✓ Consider matte/anti-glare on front face if scanners are used under strong overhead lights
✓ Keep lamination clean—dust can create local haze and scatter light
Finish selection is a balance between appearance, handling experience, and wear resistance. A “premium look” is not always the most durable choice for a given environment.
Gloss delivers strong color saturation and sharp photo contrast—popular for membership cards and branded IDs. However, it can show scratches and fingerprints more clearly and may create glare under strong lighting.
Matte surfaces reduce reflections, which helps when IDs are frequently scanned or checked visually in bright indoor lighting. Matte also hides minor scratches better, though it can slightly reduce color “pop” compared to gloss.
Depending on where IDs are used, functional surfaces can improve reliability:
anti-static reduces dust attraction during lamination and stacking;
anti-fog can be useful for environments with temperature shifts; specialized coatings can also support easier cleaning.
Even with the right film, inconsistent lamination settings can cause bubbles, warping, or weak bonding. Control the basics first and document your “golden settings” per film thickness and finish.
Common failure → likely cause:
✓ Edge lift / delamination → insufficient heat/pressure, contamination, or mismatch with print layer
✓ Bubbles → trapped air, moisture, dust, or too fast cycle for your thickness
✓ Warping → overheating, uneven pressure, or cooling too quickly on one side
Cooling is part of the lamination cycle. For higher yields, keep cooling consistent and avoid stacking hot sheets/cards too tightly, which can lock in warp. A controlled cooling step often improves flatness and reduces edge stress.
A production-ready lamination film should be evaluated not only by appearance, but also by measurable properties that connect to your downstream processes (cutting, punching, reader use).
QC items you should routinely check:
✓ Thickness average & tolerance (across roll width and along roll length)
✓ Optical clarity / haze (especially over photos and barcodes)
✓ Adhesion strength after lamination (including after aging test if required)
✓ Surface defects: gels, specks, streaks, orange peel
✓ Cutting performance: edge whiteness, burrs, cracking
If you need broader context on PVC film types and manufacturing controls, the supplier knowledge base can be helpful:
Knowledge.
Many lamination defects are caused by storage and handling rather than film formulation. Dust, pressure marks, and humidity exposure can reduce clarity and bonding.
Best practices:
✓ Store rolls flat-ended and protected from dust
✓ Avoid direct sunlight and heat sources to reduce curl and deformation
✓ Let film acclimate to the workshop environment before lamination to reduce condensation risk
Professional suppliers typically wrap rolls with dust-protection (PE film or kraft paper) and label specifications for traceability. If you need export-ready supply capability and OEM customization, you can review the company profile on
About Us
or request specifications and samples via
Contact.
When comparing offers, focus on repeatability and support rather than only unit price. For ID lamination, the cost of rework and scrap can exceed the “savings” of an unstable film.
Look for full-process control (calendering, printing, slitting, packaging), batch traceability, and clear QC documentation. Films designed for indoor contact should also align with recognized compliance expectations (for example, REACH/RoHS and relevant safety requirements).
Questions to ask before placing bulk orders:
✓ Can you provide thickness tolerance data and QC reports by batch?
✓ What finishes are available (gloss/matte/functional), and how stable is the haze level?
✓ Do you support OEM/ODM sizing, roll length, and packaging for my line?
✓ What is the recommended lamination window (temperature/pressure/time) for this film?
It depends on your full card structure (core thickness + two overlay films) and the target standard. Many producers tune overlay thickness to achieve the required final thickness while keeping good clarity and flatness.
Common causes include dust, trapped air, residual moisture in printed sheets, insufficient heat/pressure, or cycle time that’s too short for the chosen thickness. Process stability and cleanliness are usually the first fixes.
Matte often hides scuffs better and reduces glare, while gloss can show scratches but delivers higher visual “pop.” The better choice depends on how the card is handled and scanned.
Yes. High haze or strong glare can reduce scan performance. Using high-transparency film and selecting a scan-friendly finish (often matte/anti-glare for bright environments) helps maintain readability.
Yes. Many manufacturers offer OEM/ODM options such as thickness, width, roll length, surface treatment (e.g., anti-static), and export-ready packaging to match your production line.